How to Apply False Eyelashes
- Category: Eye Makeup Tutorial, Makeup, Tips & Tutorials
- Reply to post
If your eyelashes are shorter or thinner than you would like, learn how to apply false eyelashes for a fluttering, flattering look. There are tools to help and not all false lashes are incredibly dramatic. In fact, some look so natural, you’d never even suspect they were false, so don’t be intimidated.
How to Apply False Eyelashes
How to Apply False Eyelashes
When it comes to eyelash application, practice makes perfect. Try your hand at applying your lashes before you make your first public appearance. Choose between four types of eyelashes; full set, half set, individual and clumps. Beginners should try half or full sets of lashes first as they are easier to handle. After some practice, graduate to the two other types.
Full Sets
Use these steps for getting longer, glamorous looking eyelashes with full sets.
- Prep: Clean your eyelids with an oil-free cleanser or oil-free eye makeup remover. Eyelash adhesive will not cling to skin that is oily. Do not use oil-based makeup on the eye area. Optional: Apply fresh, dark liner and a light coat of mascara.
- Mark: You’ll need to trim the band of the eyelashes so they fit your eyes perfectly. Before applying glue, hold the lashes in an upside-down U shape with the thumb and forefinger of each hand. Hold the eyelash over your eye, placing it evenly above the lash line. Move your finger on the false eyelash, marking where your natural lash line stops.
- Clip the ends: Remove the lash from your eye and clip the end off. The false eyelashes should only be as long as your natural lash line. Always remove the outer edge — usually the longest — and leave the inner edge intact. This is for a more natural and more comfortable fit. If you’re using a half set, which starts at the mid-point of your lash line rather than the inner corner, you may be able to get away with skipping the trimming step. Use your judgment and take into account what kind of effect you want.
- Trim the length: Trim up the false eyelashes cutting away some of the length. Most false eyelashes are too long to wear without trimming first. Snip away one or two lashes at a time. Trim the inner lashers making them slightly shorter than the lashes at the end. Do this for both eyelashes.
- Prep the glue: Squirt a tiny drop of lash glue on a piece of paper, foil, or in a small dish. Regular white lash glue is best for beginners because it dries clear; dark lash glue will give a more dramatic effect, but could be messy while you’re still perfecting your technique.
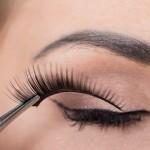
- Apply glue to the lashes: Turn the lashes upside down in front of you, holding the lashes (not the band) with tweezers or a lash application tool, available in a set with some false lashes. Drag the band through the glue, then use a toothpick or your finger to make sure the band is lightly, evenly coated.
- Let lashes rest: Let the lashes rest for 30-60 seconds so the glue gets tacky. If you’re using white glue, it’ll start to turn clear when it’s tacky.
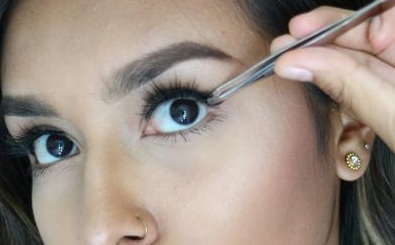
- Begin to press on the lashes: Stand in front of a mirror under bright lighting and tilt your head back for the best angle. Press your eyelash onto your eye starting at the inner corner (or middle, if using a half set) of the eye.
- Work each lash segment: Push down on the eyelash as you work each segment onto your skin. The false eyelashes should be as close to your natural lash line as possible, but do not press the glue onto your natural lashes. Do this for both sides.
- Let lashes dry: Allow the eyelashes to dry for three minutes before curling them with an eyelash curler.
- Finish with liner and mascara: Apply liquid eyeliner to the seam where your false eyelashes meet your eye skin, then use a natural mascara (skip the volumizing, lengthening ones this time) to blend your lashes with the false ones. This will give you a smooth, more natural look and it will hide any glue.
Applying Clumps and Individual Lashes
The process for applying the other two types of eyelashes is similar.
- Prep your eye and apply the glue just as you would if applying a full set of eyelashes.
- Clumps and individual lashes should be applied starting at the outer edge of the eye.
- Use a pair of tweezers to hold the smaller pieces in place or for moving the lashes around.
- Fill in bare spots in your lash line with the smaller eyelash segments.
Many of the individual lash sets are meant to be worn for more than a night and the glue lasts longer, even through washes. Be sure to read the whole label and directions on your lash set before applying. Find out ahead of time what kind of removal method will be required, as well.
Eyelash Application Tips
Before beginning your eye makeover, review these tips for the best results.
- Only use fake lashes occasionally. Everyday wear may be too rough on your eyes and could result in an eye infection or lash loss.
- If using reusable lashes, clean them after every use. Follow the manufacturer’s instructions and only use recommended cleaning products.
- Allow freshly washed lashes to dry before applying them to your eyes.
- Remove the glue completely after you remove the lashes.
- Never apply eye glue adhesive directly to your eyes.
- Remove the eyelashes using the procedure recommended by the manufacturer.
Anyone Can Wear False Lashes
If you’re not happy with your natural lashes or you want something with a little more “oomph” for a special occasion or date with someone special, you can wear false lashes. The important thing it to practice applying them a few times beforehand. You may want to purchase more than one pair of lashes. Practice with one pair, applying over and over (clean off the glue and mascara after each time, of course). Then once you’ve mastered the application, you can pull out the fresh pair for the big event.

Related posts
 Glueless Method for Applying False Eyelashes
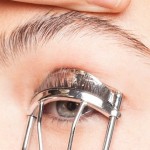 Simple Steps to Under Curling Eyelashes
 How to Apply Fake Eyelashes Fast & Easy
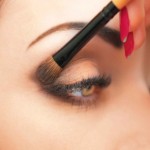 Simple Eye Makeup Tips For Beginners
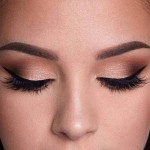 Expert Tips for Making Small Eyes Look Bigger
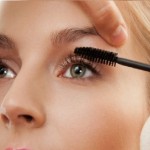 Application Advice for Avoiding Bleeding Mascara
 How to Apply Each Type of Eye Makeup
 How to Get Dramatic Eyes in Five Fast Steps
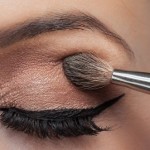 Few More Eye Makeup Tips For Beginners
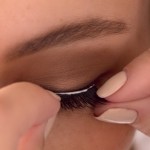 How to Apply False Lashes