11 Easy Steps To A Gorgeous Festive Makeup Look
- Category: Makeup, Makeup Tips & Tricks, Tips & Tutorials
- Reply to post
This look is perfect for either New Year’s Eve or other festivities that you might have coming up. I will talk you through how to recreate this look step by step, explaining what products I used and how I used them!
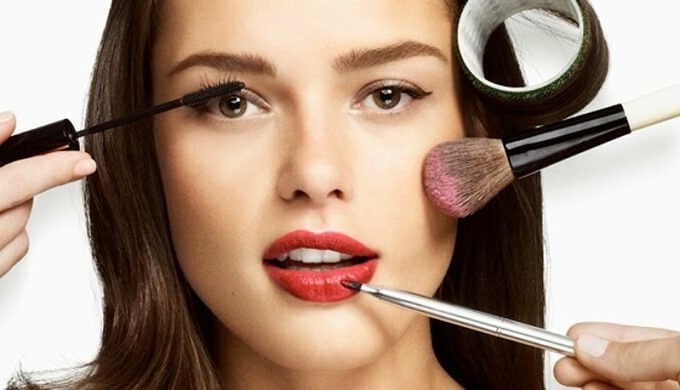
11 Easy Steps To A Gorgeous Festive Makeup Look
Step 1:
First of all, we need to create a good base for the makeup that we are going to use. So, after applying my daily moisturizer, I applied the Max Factor Facefinity All Day primer all over my face. This primer will make your makeup last all night long.
Step 2:
Next up, foundation! My personal favorite at the moment is the Clinique Anti-Blemish Solutions foundation. I have this in the shade 02 ‘Fresh Ivory,’ but since this is a bit too dark for me, I mixed it with the MAC Studio Face and Body foundation in the white shade. Using the Primark stippling brush, I applied and blended this combination of foundations.
Step 3:
Because I wanted the foundation to set for a moment, I moved on to the eyebrows. I filled them in using the Beauty UK High Brow All in One Brow Definition kit. With the Real Techniques Brow brush, I made sure my eyebrows were as even as possible.
Step 4:
It is now time to work on the eyes! But just like the rest of the face, the eyes need some priming. For that I used the Too Faced Shadow Insurance Anti-Crease eye shadow primer
Step 5:
For my eye shadows, I used the Makeup Revolution ‘I Heart Chocolate’ palette. I started by blending a few of the gold shades together and applying these all over my lids. Then, with a dark brown shade, I created some depth, putting this on the outer corner of my eye and a little bit higher into the crease. Make sure you blend everything together so there are no harsh lines! I also put the matte highlighting shade onto my brow bone and the shimmery highlighting shade on the inner corners of my eyes.
Step 6:
After curling my eyelashes, I applied a few coats of the L’Oréal False Lash Wings waterproof mascara, and then I also applied the Ardell Natural Wispies false lashes to make my lashes look even longer and fuller.
Step 7:
The eyes are almost done! All that’s left is some eyeliner. I used the Eyeko Black Magic eyeliner for a thin line right above my lash line, and then I used the Sephora Long Lasting Kohl pencil in the shade 07 ‘Infinite Beige’ on my waterline to brighten my eyes a little bit.
Step 8:
Now that the eyes are done, we can go back to the face. First off, some concealer is needed. I used the MAC Pro Longwear concealer in the shade NC15 wherever I felt like I needed it, blending it out with my foundation brush.
Step 9:
To make sure that all of this makeup was long-lasting, I used the Clinique Stay Matte Sheer pressed powderin the lightest shade.
Step 10:
All that’s left are just a few final touches, like some bronzer and highlighter! With the Real Techniques Multi Task brush I applied the Beebee bronzer in the shade 9 ‘Natural Tan’ to give my face a bit of color. After that, I used the Real Techniques Contour brush to apply the MUA Undress Your Skin shimmer highlighter in ‘Pink Shimmer’ on the cheekbones for that festive glow.
Step 11:
Last but not least: the red lip. I used the LookX lip & blush stick in the shade ‘Red Carpet.’ I also set my makeup with a few sprays of the MAC Fix+ — but of course that is totally optional!
So this was the entire process I went through to achieve this festive look. I hope you like this look and maybe even try it out yourself. Good luck!

Related posts
 How to Apply Party Makeup Step by Step
 9 Makeup Tips For Long-Lasting Makeup
 18 Genius Hacks for Fixing Makeup Mistakes Every Woman Makes
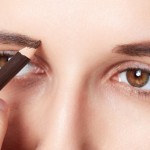 Common eyebrow mistakes and how to fix them
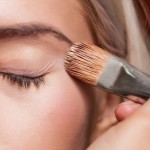 The Ultimate Step-By-Step Tutorial for Perfect Makeup Application
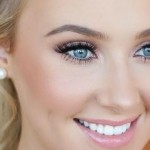 MAC Makeup Look Tips
 20 Makeup Hacks Every Busy Girl Needs To Know
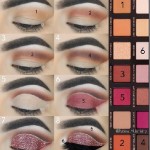 6 Makeup Mistakes That Make Can You Look Older
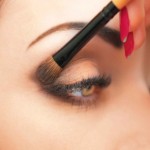 Simple Eye Makeup Tips For Beginners
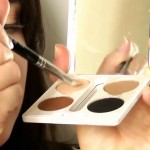 5 Makeup Tips and Tricks You Cannot Live Without!